How To Save Something You Finished On CapCut Easily Today
How To Save Something You Finished On CapCut Easily is a common question many users ask after editing their video. You spend hours cutting clips, adding music, and fixing colors. Then you feel confused at the last step. Where is the save button? How to export properly? Well, don’t worry. It is actually very simple.
Many beginners think saving and exporting are different things. Frankly speaking, in CapCut, you have to export the video to your device to save the project you have completed. Your video will be secure in your gallery, in case you do the right things. In this guide, I will explain How To Save Something You Finished On CapCut Easily in a clear and simple way.
Why Saving Your Finished Project Correctly Matters in CapCut
When you finish editing, the last step is very important. If you choose wrong settings, your video may lose quality. It may look blurry. Sometimes, the file size becomes too large. That is why saving correctly matters a lot.
Many users of CapCut for Android and CapCut for iOS forget to check resolution before export. On bigger systems like CapCut for PC and CapCut for Mac, there are more options. So you must choose wisely. Good settings mean better results.
How To Save Something You Finished On CapCut Easily on Mobile
It is extremely easy when using a phone. Open your finished project. Look at the top right corner. You will see the Export button. Tap on it. That’s it. However, wait there are some options that you need to look at.
Then choose a resolution, 720p or 1080p before exporting. Also check frame rate. If you post on social media, 1080p with 30fps is good. Then tap Export again. Now CapCut will start rendering your video. After that, it will automatically save to your gallery. That is how you do How To Save Something You Finished On CapCut Easily on mobile.
Save Finished Video on CapCut for Android and iOS
The steps are nearly similar in CapCut Android and CapCut iOS. After editing, tap Export. Choose quality. Allow the process to be completed. Do not shut the application during exportation. If you close it, your video may not save properly.
After rendering, you will see options to share on TikTok or other apps. You can skip that. Your video is already saved in your device gallery. It is simple and smooth, you know.
Fix Export Problems While Saving in CapCut
Sometimes users face issues. The video does not save. The app crashes. Well, this usually happens because of low storage. Check your phone storage first. Free some space and try again.
Another problem is using an outdated version. If you use CapCut Old Version, some features may not work well. Update the app from official source. Clearing cache can also fix small bugs. These small steps really help.
How To Save Something You Finished On CapCut Easily on PC and Mac
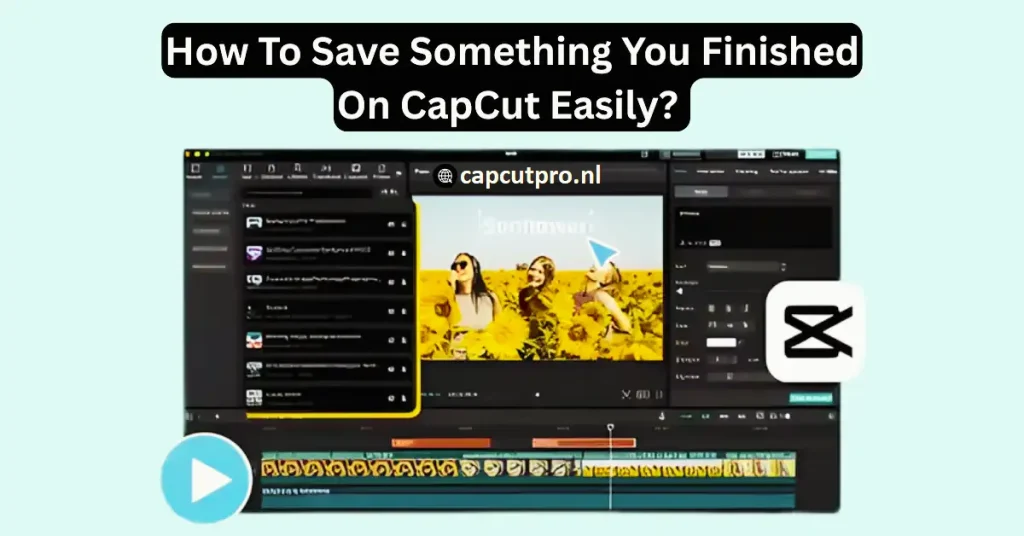
Saving on computer is slightly different but easy. Import your project to CapCut PC or CapCut Mac. Click on the button marked Export at the upper right. A new window will appear with settings.
The following are the options of resolution, format, frame rate and file location. Choose the folder of your desired location to save the video. Then click Export. The software will process your file and save it to your selected folder. This is the simple way of How To Save Something You Finished On CapCut Easily on desktop.
Using CapCut Pro Features While Saving Projects
Some users prefer CapCut Pro because it offers advanced export settings. With CapCut Pro, you can unlock better effects and high quality export options. This is helpful for content creators.
You may hear about CapCut Pro APK or CapCut Mod APK online. Honestly, downloading modified apps is risky. Always be careful. When you are searching CapCut Pro APK Download or CapCut Pro APK Download Latest Version, you must ensure that you are using reliable sites. Extra features do not matter as much as safety.
Best Export Settings for High Quality Videos
Choosing right settings is important. In the case of YouTube or Facebook, 1080p resolution is acceptable. In the case of small social media clips 720p will also work. In case you have the device with 4K support, you can select it, but it will have a large file size.
Frame rate matters too. 30fps is normal and smooth. 60fps looks more fluid but increases size. If your phone is not powerful, stay with 30fps. Well, simple settings often work best.
Conclusion
Now you clearly understand How To Save Something You Finished On CapCut Easily. The process is not hard. You only need to press Export, choose good settings, and wait for rendering. That’s all.
Always check your storage before saving. Do not close the app during export. Use updated versions for smooth performance. Such little measures avert great issues.
The process is virtually the same if you are using mobile or PC. Just select resolution and click export. Frankly speaking, after having done it once, you will never be lost.
Now that you have finished editing, keep this guide in mind, and use the easy steps. Try it now and save your video without stress.
FAQs
- How do I save a finished project in CapCut?
Open your project, tap or click Export, choose resolution, and wait for rendering. The video will automatically save to your device or selected folder. - Why is my CapCut video not saving?
This is normally caused by low storage, crashing of applications, or old version. Free space, update the app, and deal with the export once again. - Where does CapCut save exported videos?
On mobile, videos save in your gallery. They would save on the folder you have chosen during the export process on PC or Mac. - Can I save CapCut video without watermark?
Yes, in most situations CapCut can be exported without a watermark. Make sure you remove ending watermark clip before exporting. - How long does CapCut take to export a video?
Video length and settings of the video quality determine the export time. Short videos export in seconds. Long 4K videos may take several minutes. - What is the best quality setting when saving in CapCut?
1080p with 30fps is best for most platforms. It gives good quality and balanced file size.